Hey there, lash lovers! If you're reading this, chances are you're ready to bid farewell to those falsies and remove your lash extensions at home. But hold up! Before you grab the nearest pair of tweezers or douse your eyes in oil, let's talk about how to do it safely without damaging your natural lashes. Removing lash extensions isn’t as daunting as it seems—just follow our step-by-step guide and you’ll be good to go!
Now, I know what you’re thinking: "Can I really remove lash extensions myself?" The short answer is yes—but only if you do it the right way. Mishandling the process can lead to damaged natural lashes, irritated eyes, or worse, an infection. So, stick around because we’ve got all the tips and tricks you need to make this process a breeze.
In this article, we’ll cover everything from understanding how lash extensions work to the safest methods for removal. Whether you’re a DIY enthusiast or just looking to save some cash, this guide will walk you through the process like a pro. Let’s dive in and get those lashes back to their natural glory!
- Unleashing The Power Of Ai Fbb Your Ultimate Guide To Transforming Everyday Life
- Taylor Swift And Swarovski The Sparkling Collaboration You Didnrsquot Know You Needed
Table of Contents:
- Understanding Lash Extensions
- Tools You’ll Need for Removal
- Preparing for the Removal Process
- Step-by-Step Guide to Removing Lash Extensions
- Common Mistakes to Avoid
- Aftercare Tips for Your Natural Lashes
- Alternatives to DIY Removal
- Frequently Asked Questions
- Wrapping It Up
Understanding Lash Extensions
Before we get into the nitty-gritty of how to remove lash extensions at home, let’s break down what lash extensions actually are. Lash extensions are individual synthetic lashes that are glued onto your natural lashes one by one. They’re designed to enhance the length, thickness, and curl of your natural lashes. Sounds fancy, right? But like all good things, they don’t last forever.
Why do lash extensions need to be removed? Over time, the adhesive used to bond the extensions starts to weaken. If not removed properly, the extensions can fall off randomly, leaving behind uneven lash lines. Plus, leaving them on for too long can cause damage to your natural lashes, so it’s important to remove them before they start causing problems.
- Azealia Banks September 9 The Untold Story Of A Fearless Icon
- What Does Leslie Sansone Look Like Today Discover The Queen Of Walking Workouts
Types of Lash Extensions
There are different types of lash extensions, each with its own removal considerations:
- Mink lashes: These are made from animal hair and require a gentle removal process.
- Synthetic lashes: The most common type, these are made from synthetic fibers and can be removed with standard methods.
- Silk lashes: These are softer and lighter, but still require the same care during removal.
Tools You’ll Need for Removal
Now that you understand the basics, let’s talk about the tools you’ll need to safely remove your lash extensions at home. Don’t worry, you don’t need a fancy salon setup—just a few essential items will do the trick.
- Lash extension remover: A gentle, oil-free remover specifically designed for lash extensions.
- Cotton pads: Soft and absorbent, perfect for applying the remover.
- Cotton swabs: Great for targeting specific areas without irritating the skin.
- Clean towels: To wipe away excess product and keep your face dry.
- Clean hands: Always wash your hands before touching your eyes!
Where to Find These Tools
You can find most of these tools at your local beauty supply store or online. Just make sure to choose products that are safe for use around the eyes. Pro tip: Avoid using household oils like coconut oil or olive oil, as they can clog pores and irritate the skin.
Preparing for the Removal Process
Preparation is key when it comes to removing lash extensions at home. Taking the time to set up properly will ensure a smooth and safe process. Here’s what you need to do:
1. Create a calm environment: Find a quiet, comfortable space where you can focus on the task at hand. Dim the lights if possible to reduce eye strain.
2. Clean your face: Make sure your face is free of makeup and excess oils. This will help the remover work more effectively.
3. Protect your skin: Apply a thin layer of petroleum jelly around your eyes to prevent irritation from the remover.
Why Preparation Matters
Skipping the prep work can lead to unnecessary complications. For example, applying remover to dirty lashes can cause the product to break down more slowly, prolonging the process. Plus, failing to protect your skin can result in redness or irritation. Trust me, you don’t want that!
Step-by-Step Guide to Removing Lash Extensions
Alright, let’s get down to business! Follow these steps carefully to remove your lash extensions safely and effectively:
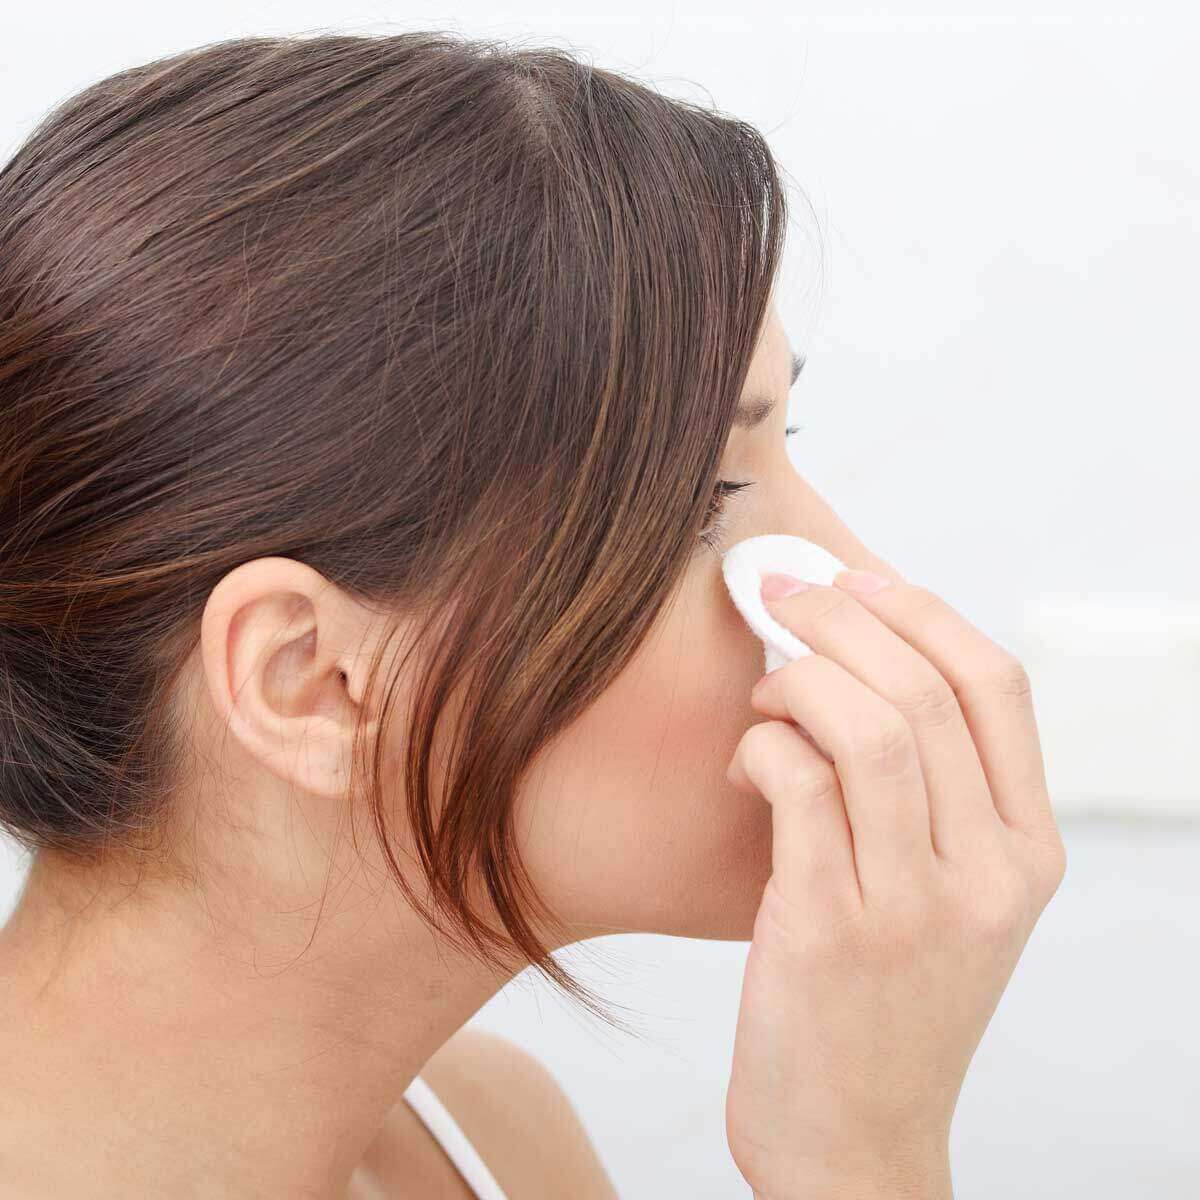
- Start by applying a small amount of lash extension remover to a cotton pad.
- Gently press the cotton pad onto your closed eyelid, making sure it covers all the lashes.
- Let the remover sit for 5-10 minutes to break down the adhesive.
- Use a cotton swab dipped in remover to gently wipe away any remaining glue.
- Repeat the process on the other eye, if necessary.
- Finish by rinsing your eyes with lukewarm water and patting them dry with a clean towel.
What to Expect During the Process
You might feel a slight tingling sensation as the remover breaks down the adhesive. This is totally normal and shouldn’t cause any discomfort. If you experience any pain or irritation, stop immediately and consult a professional.
Common Mistakes to Avoid
Even the best of us make mistakes, but when it comes to removing lash extensions, some errors can have serious consequences. Here are a few common mistakes to avoid:
- Pulling the lashes off: This can damage your natural lashes and even cause them to fall out prematurely.
- Using harsh chemicals: Avoid using products that aren’t specifically designed for lash removal, as they can irritate your eyes.
- Rushing the process: Take your time to ensure a thorough and safe removal.
How to Avoid These Mistakes
The key to avoiding these mistakes is patience and preparation. Always read the instructions on your remover carefully and test it on a small area first. If you’re unsure about anything, don’t hesitate to reach out to a professional for guidance.
Aftercare Tips for Your Natural Lashes
Congratulations! You’ve successfully removed your lash extensions. Now it’s time to give your natural lashes some TLC. Here’s how:
- Moisturize: Use a gentle eye cream to hydrate the delicate skin around your eyes.
- Exfoliate: Gently exfoliate your eyelids to remove any leftover glue or product buildup.
- Use a lash serum: Consider applying a lash serum to promote healthy lash growth.
Why Aftercare Is Important
Your natural lashes have been through a lot, so it’s important to take care of them during the recovery period. Neglecting aftercare can lead to weak, brittle lashes that are prone to breakage. Treat them well, and they’ll thank you later!
Alternatives to DIY Removal
Not everyone is comfortable removing their lash extensions at home, and that’s perfectly okay. If you’d rather leave it to the pros, here are a few alternatives:
- Visit a lash technician: A professional can safely remove your extensions in no time.
- Try a lash lift: This is a great option if you want to enhance your natural lashes without extensions.
- Use false lashes: A temporary alternative that’s easy to apply and remove.
When to Seek Professional Help
If you experience any issues during the removal process, such as excessive irritation or discomfort, it’s best to seek professional help. A licensed lash technician can assess the situation and provide a safe solution.
Frequently Asked Questions
Got more questions? We’ve got answers! Here are some of the most common questions about removing lash extensions at home:
- Q: Can I use coconut oil to remove lash extensions? A: Not recommended, as it can irritate the skin and eyes.
- Q: How long does it take to remove lash extensions? A: The process usually takes about 15-20 minutes per eye.
- Q: Can I wear makeup after removing lash extensions? A: It’s best to avoid makeup for at least 24 hours to allow your lashes and skin to recover.
Wrapping It Up
And there you have it—a comprehensive guide on how to remove lash extensions at home safely and effectively. Remember, the key to a successful removal is preparation, patience, and proper aftercare. By following these steps, you can enjoy beautiful, healthy lashes without the hassle of salon visits.
So, what are you waiting for? Grab your tools and get to work! And don’t forget to share your experience in the comments below. We’d love to hear how it went for you. Happy lash removal, friends!
- Alba Nunell The Rising Star Of Fashion And Entertainment
- Amyywoahh Nudes The Truth Behind The Hype And What You Need To Know