Changing your car's oil might seem intimidating, but with the right tools and knowledge, it becomes a breeze. If you've ever wondered, "Which screw is used for an oil change?" you're in the right place. In this article, we'll break down everything you need to know about oil changes, from the drain plug to the oil filter and beyond. So, buckle up and let's dive into the world of DIY car maintenance!
Picture this: you're standing in your garage, tools in hand, ready to tackle your first oil change. But wait, you're stuck on one crucial question—what screw are you supposed to remove? Don't worry; it happens to the best of us. This guide will walk you through the process step by step, ensuring you never feel lost again.
Whether you're a seasoned mechanic or a complete beginner, understanding the basics of oil changes is essential for keeping your vehicle running smoothly. We'll cover everything from the tools you need to the exact screw you should be looking for. So, let's get started and turn you into a pro in no time!
- Victor Bowman Jail The Untold Story Behind The Headlines
- Frutiger Aeronostalgia Outfit A Journey Back In Time
Understanding the Basics of an Oil Change
Before we dive into the specifics of which screw to use, let's take a moment to understand why oil changes are so important. Your car's engine relies on oil to lubricate its moving parts, reduce friction, and prevent overheating. Over time, the oil breaks down and becomes less effective, which is why regular changes are necessary.
Why Is Oil So Important?
Oil is the lifeblood of your engine. Without it, your car would quickly overheat and suffer irreparable damage. Here are a few key reasons why oil changes matter:
- Prevents engine wear and tear
- Improves fuel efficiency
- Extends the lifespan of your vehicle
- Keeps your engine clean
Skipping oil changes can lead to costly repairs down the road, so it's always better to stay on top of this essential maintenance task.
- What Does Bta Mean In Text Unveiling The Mystery Behind This Trendy Acronym
- Coreano Flequillo Asiatico The Ultimate Guide To This Trendy Hairstyle
Which Screw is Used for an Oil Change?
Now, let's get to the heart of the matter. When performing an oil change, there are two main screws or components you'll need to focus on: the drain plug and the oil filter. Let's break them down one by one.
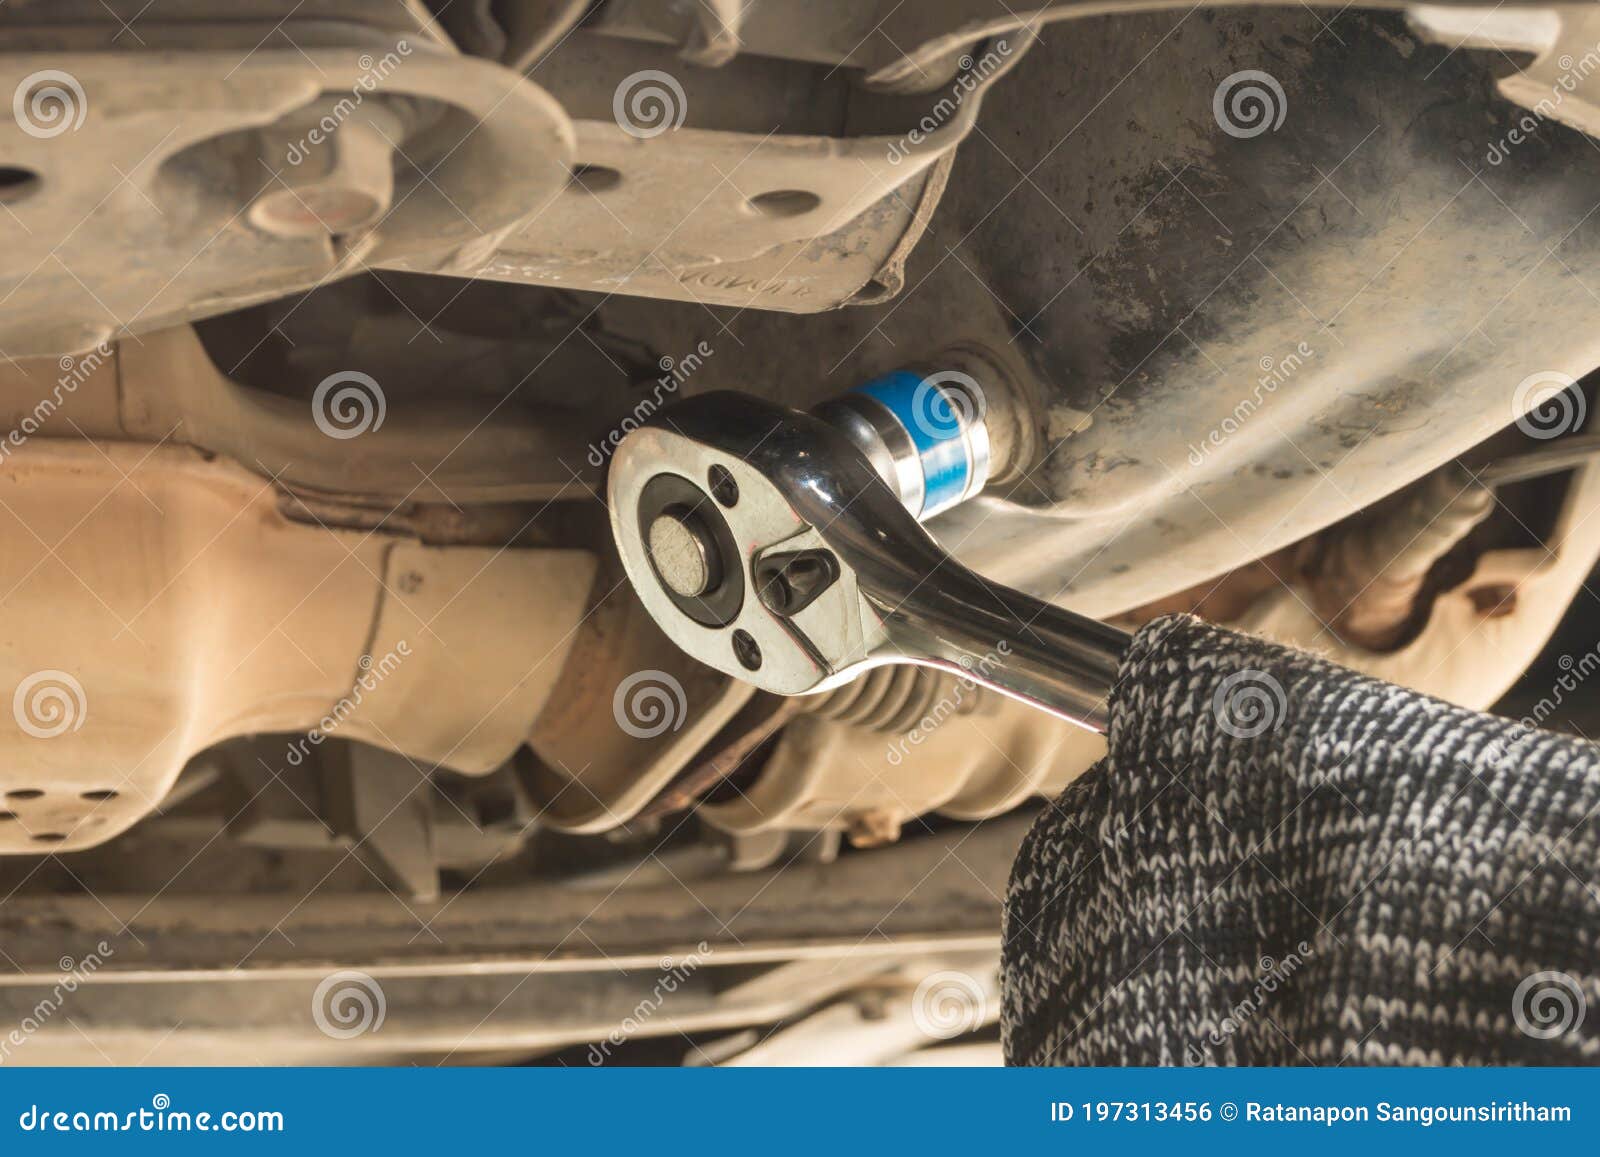
The Drain Plug: Your Gateway to Fresh Oil
The drain plug is the screw located at the bottom of your car's oil pan. This is the component you'll need to remove to drain the old oil from your engine. Typically, the drain plug is a large bolt with a hexagonal head, and you'll need a wrench to loosen it. Be careful when removing the plug, as hot oil can cause serious burns.
The Oil Filter: Don't Forget This Crucial Component
While the drain plug gets most of the attention, the oil filter is equally important. This cylindrical component traps debris and contaminants, ensuring that only clean oil circulates through your engine. During an oil change, you'll need to replace the oil filter with a new one. Some oil filters screw directly onto the engine, while others require a special tool for removal.
Tools You'll Need for an Oil Change
Before you start your oil change, make sure you have all the necessary tools and supplies. Here's a quick checklist to help you prepare:
- Socket wrench or box-end wrench
- Oil catch pan
- New oil filter
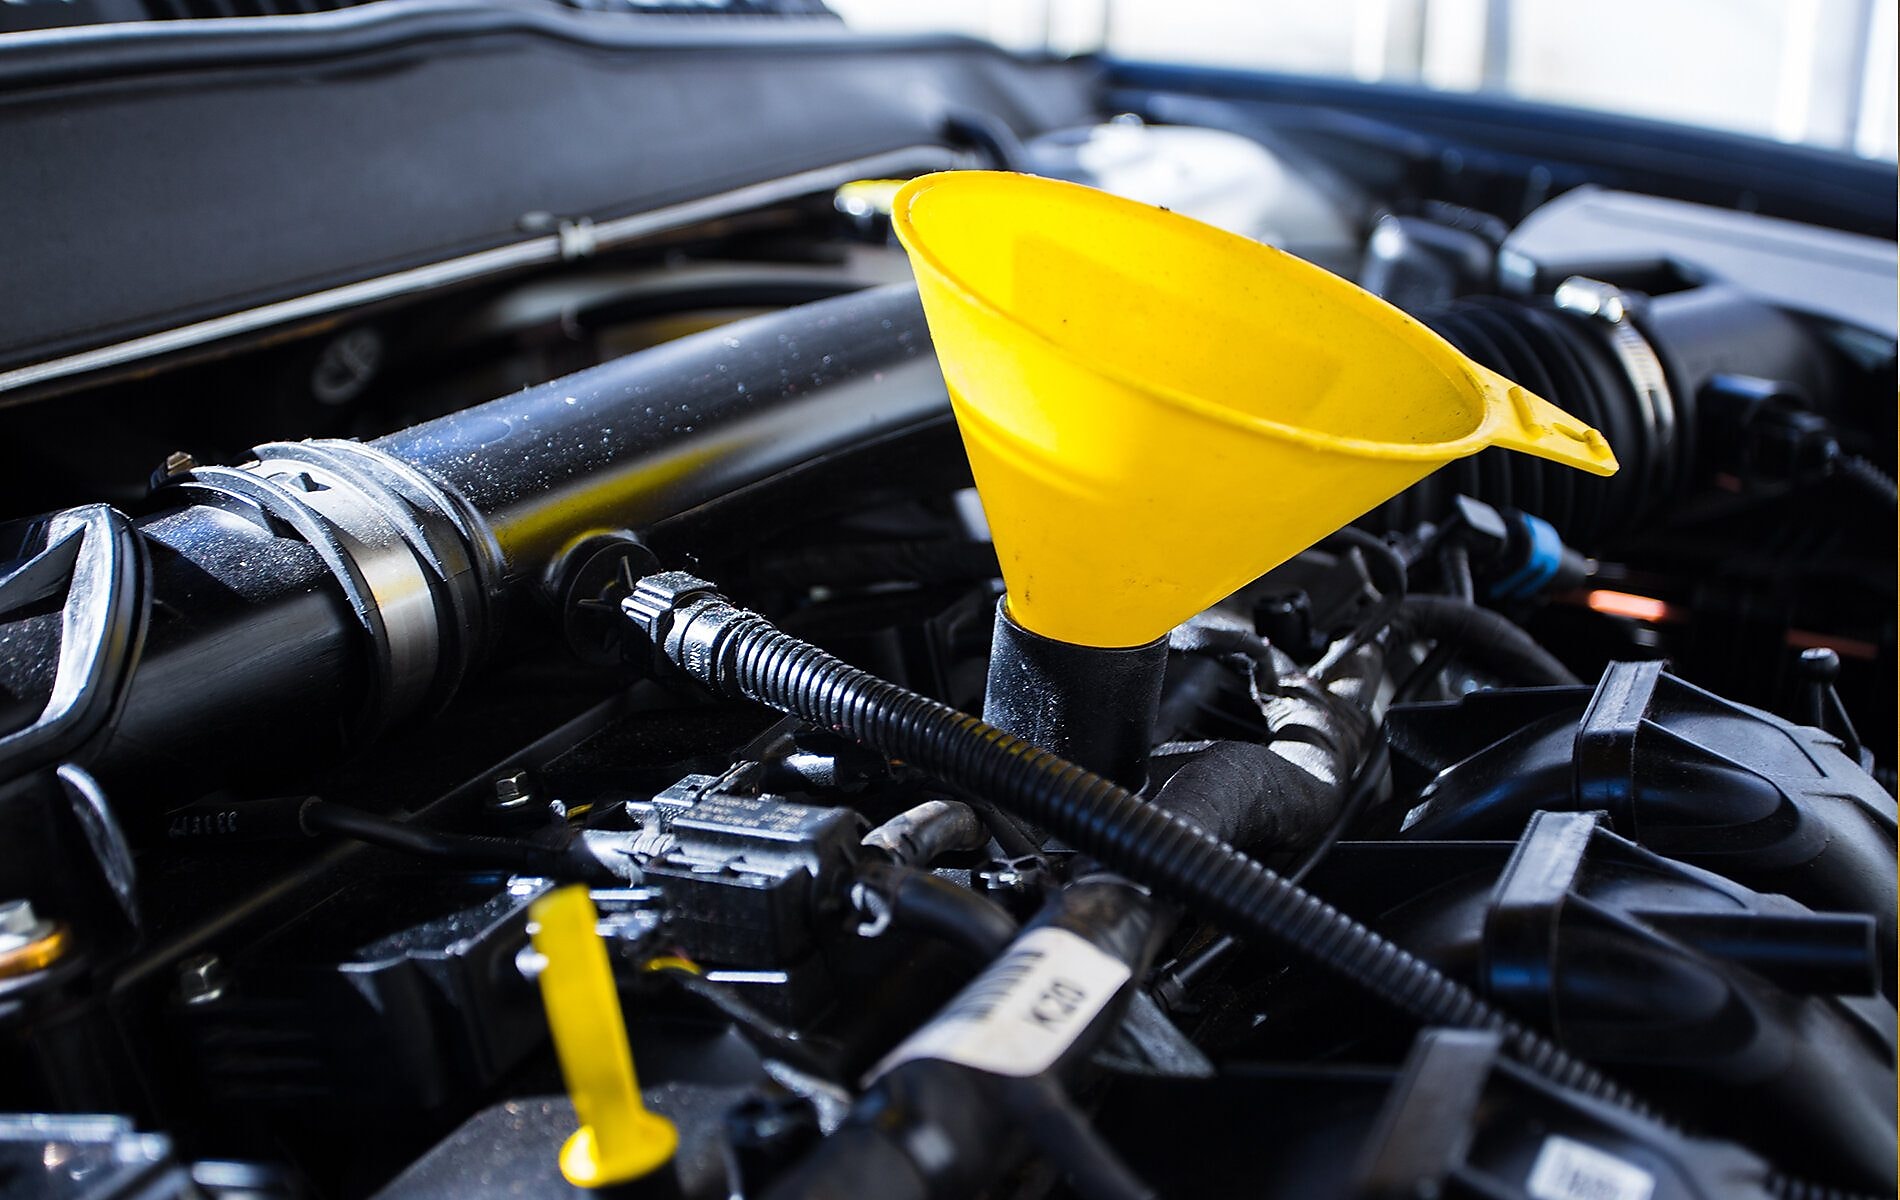
- Funnel
- New engine oil (check your owner's manual for the correct type)
- Gloves and safety glasses
Having the right tools will make the process smoother and more efficient, so don't skip this step!
Step-by-Step Guide to Changing Your Oil
Now that you know which screw to use, let's walk through the entire oil change process step by step:
Step 1: Prepare Your Vehicle
Park your car on a level surface and turn off the engine. Allow the oil to cool slightly to avoid burns, but don't wait too long, as warm oil drains more easily.
Step 2: Drain the Old Oil
Place the oil catch pan underneath the drain plug and use your wrench to loosen it. Be prepared for the oil to flow quickly, and make sure the pan is large enough to hold all the oil.
Step 3: Replace the Oil Filter
Using a filter wrench or your hands, unscrew the old oil filter and replace it with a new one. Apply a small amount of new oil to the rubber gasket on the new filter to ensure a good seal.
Step 4: Refill the Engine with New Oil
Using a funnel, pour the recommended amount of new oil into the engine. Check your owner's manual for the correct type and quantity of oil.
Step 5: Check the Oil Level
After refilling, use the dipstick to check the oil level and ensure it's within the recommended range. Start the engine and let it run for a minute, then check for leaks around the drain plug and oil filter.
Tips for a Successful Oil Change
Here are a few additional tips to help you achieve a flawless oil change:
- Always dispose of used oil properly at a recycling center.
- Keep a clean rag handy to wipe up any spills.
- Follow your vehicle's maintenance schedule for optimal performance.
- If you're unsure about any step, consult your owner's manual or seek professional advice.
Common Mistakes to Avoid
Even the most experienced DIYers can make mistakes during an oil change. Here are a few common errors to watch out for:
- Forgetting to replace the oil filter
- Over-tightening the drain plug, which can cause leaks
- Using the wrong type of oil for your vehicle
- Not checking for leaks after completing the change
By avoiding these pitfalls, you'll ensure a smooth and successful oil change every time.
How Often Should You Change Your Oil?
The frequency of oil changes depends on several factors, including your vehicle's make and model, driving habits, and the type of oil you use. As a general rule, most manufacturers recommend changing the oil every 5,000 to 7,500 miles. However, always refer to your owner's manual for the most accurate information.
The Importance of Following the Manufacturer's Recommendations
Ignoring the manufacturer's oil change schedule can lead to serious engine problems. Modern engines are designed to work with specific types and quantities of oil, so sticking to the recommended schedule is crucial for maintaining peak performance.
Cost Savings and Environmental Benefits
Performing your own oil changes can save you a significant amount of money over time. Additionally, by recycling used oil properly, you contribute to a cleaner environment. It's a win-win situation for both your wallet and the planet!
Conclusion
In conclusion, changing your car's oil is a straightforward process once you know which screw to use and how to proceed. By following the steps outlined in this guide, you'll be well-equipped to tackle this essential maintenance task with confidence. Remember to always use the right tools, follow safety precautions, and dispose of used oil responsibly.
We encourage you to share your own oil change experiences in the comments below. Did you discover any tips or tricks that made the process easier? Let us know! And don't forget to explore our other articles for more DIY car maintenance advice.
Table of Contents
- Airfryer Ramen The Gamechanger In Instant Noodle Game
- Berkley Jensen 5 Burner Gas Grill The Ultimate Grilling Experience